-
Products
Services
Tools
Industry Specific
-
Solutions
By Business Type
By Business Function
By Industry
- Support
- Login
- Try it for free
You will be redirected to the Stage Pipes page once the stage folders and files creation are done.
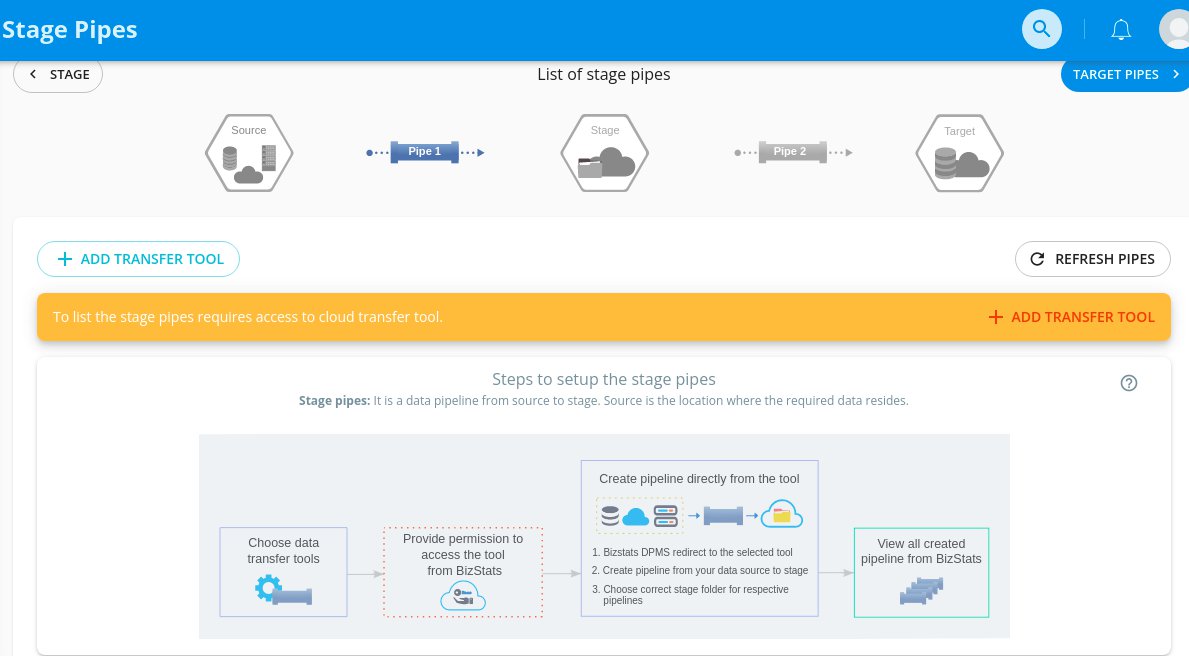
Click the “ADD TRANSFER TOOL” button to see available Transfer tools for transferring data from source to stage.
![]()
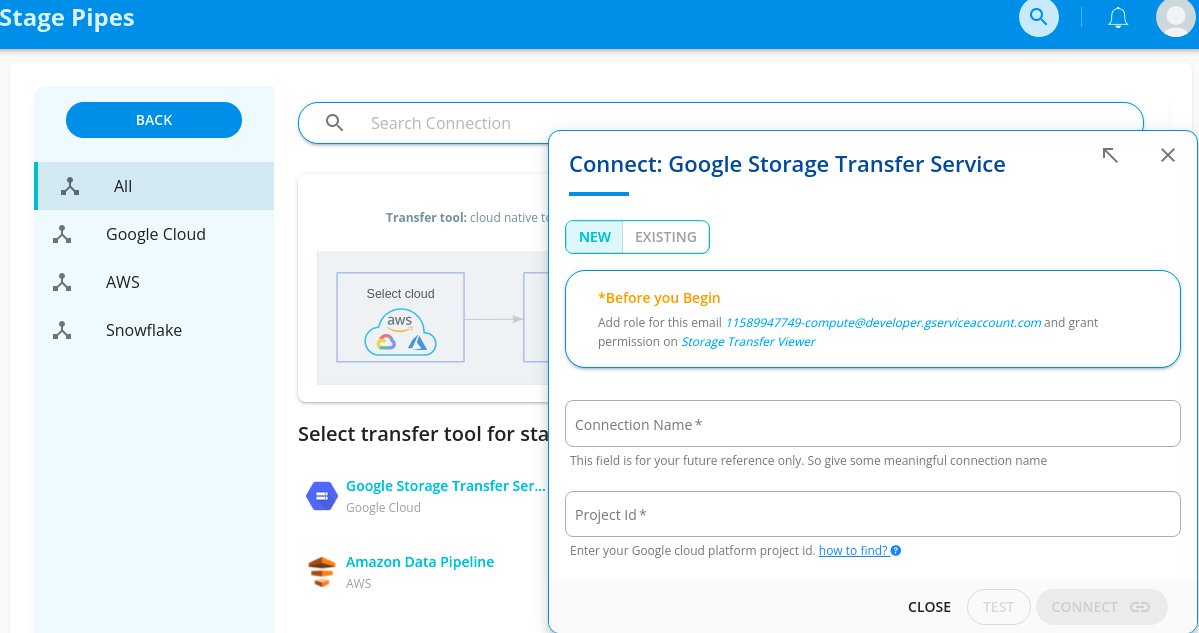
Here, we have shown the connection to Google Storage Transfer Service as an example. Enter your authentication details and click Test. You will see the pop-up, “Test connection is successful for Storage Transfer Service”. Now, click Connect.
Once the connection is created, you can see the list of stages you have created previously.
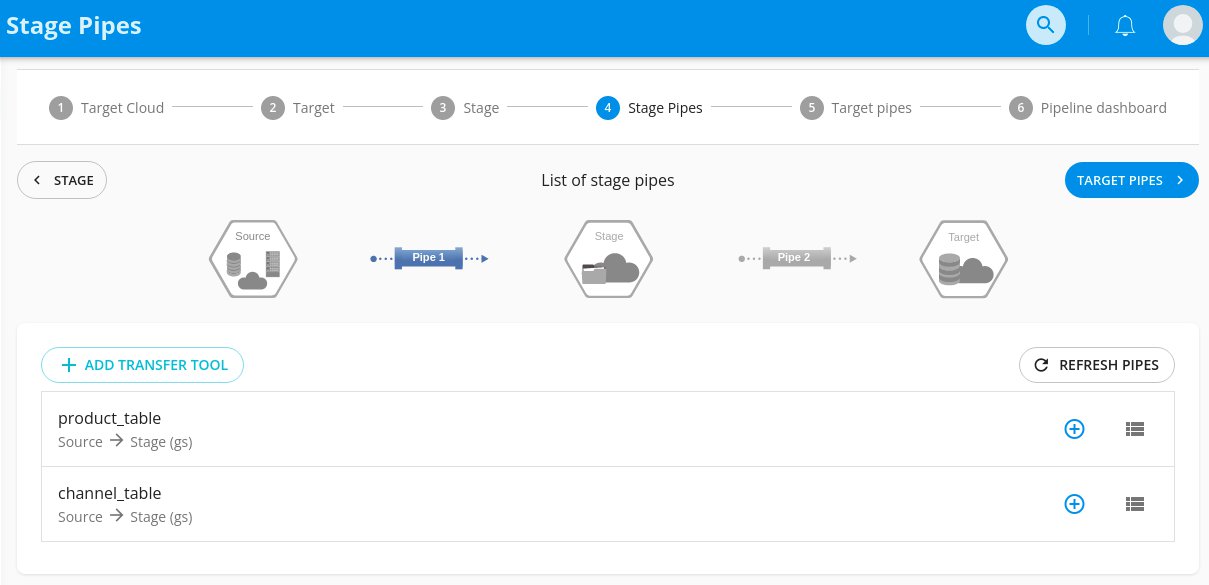
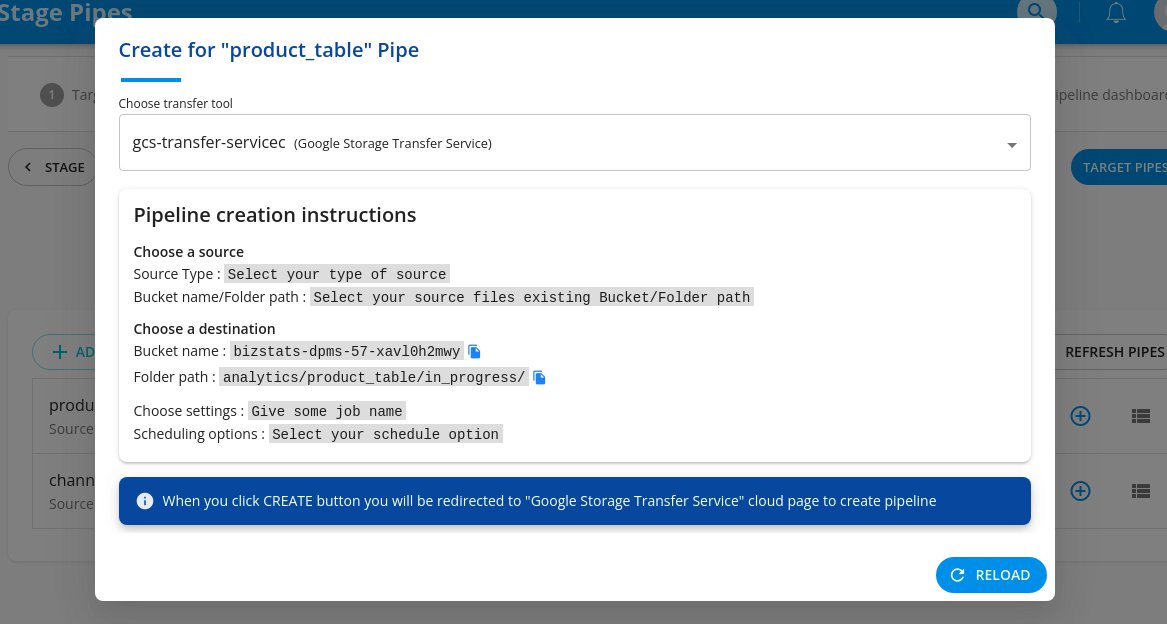
Click the “+” icon to create source to stage pipes. Now you can see the popup for step by step pipeline creation process. You can also change the transfer tool with the dropdown shown. You will be redirected to the Cloud Transfer tool creation page when you Click “CREATE” button in the New Tab.Follow the steps with copying the destination values from popup and create a pipeline in the transfer tool creation page.

Once Pipe is created, close the cloud tool tab or just navigate to the Bizstats.ai page and click the “RELOAD” button to update the stage pipes you have created just now.
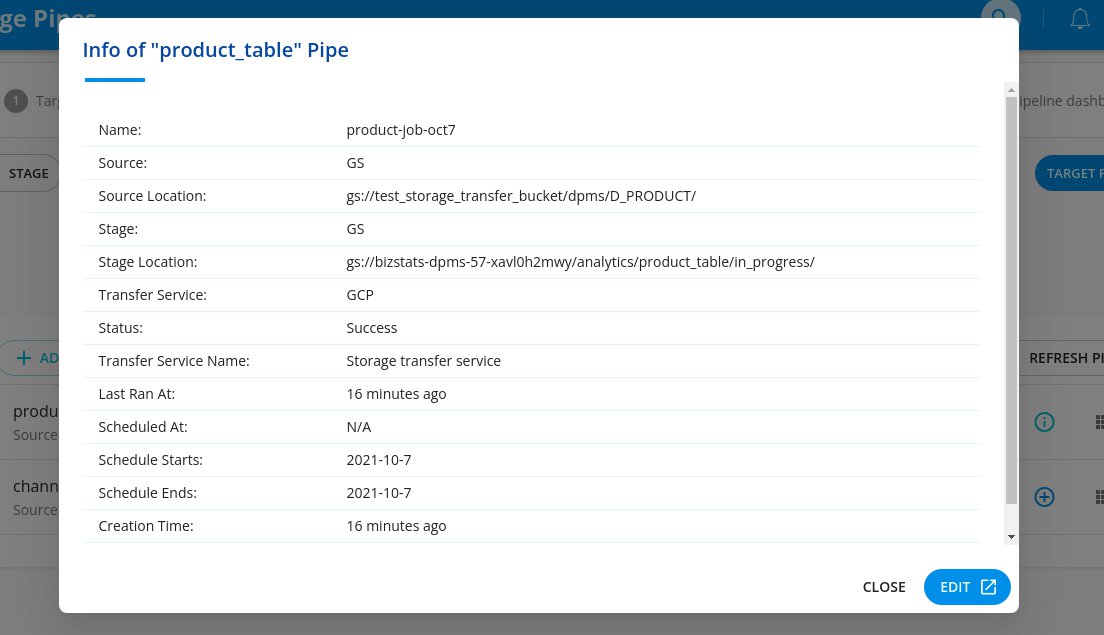
Stage pipes page will be reloaded & updates the stage pipes which you created. Here You can see the “i” info icon instead of “+” icon for the created stage pipes.
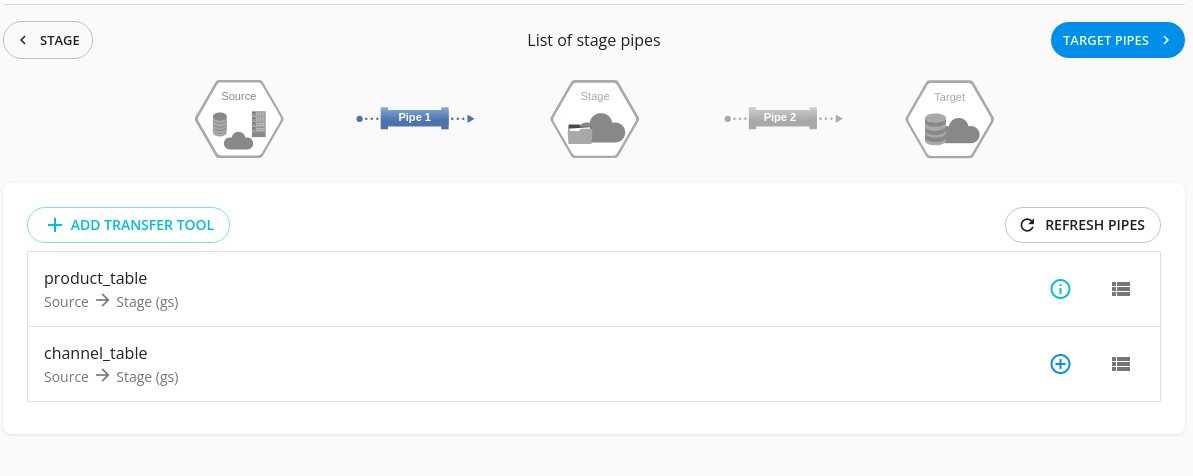
Click on the “i” info icon to view created stage pipeline details. Also you can click the “EDIT” button for editing the created pipe in the cloud tool page. Likewise you can create stage pipes for all stage folders. Later close the popup and click the “TARGET PIPES” button to proceed further.